Prepare your account
Choose your Blink username and check the Lightning Address associated with your account. This is the payment identity you share with customers and use to load your Terminal.

For merchants
Accept Bitcoin payments with a browser-based terminal or a reusable QR code. Connect your business to Bitcoin payment networks and manage incoming payments through your Blink account.
Getting started
Choose your Blink username and check the Lightning Address associated with your account. This is the payment identity you share with customers and use to load your Terminal.
Use the Terminal when staff need to enter the total. Display a reusable QR when customers should enter the amount themselves, such as for tips or simple counter payments.
Make a small test payment before serving customers. Check the destination, watch the status update and find the payment in Activity. Show your team what a confirmed payment looks like.
$12.40
Waiting for payment
Scan to pay with Bitcoin
Blink Terminal

Reusable QR & Lightning Address
Print your Lightning Address QR and leave it by the till. Customers enter the amount themselves, and every payment is recorded in your Activity — into your Bitcoin or Dollar Balance.
| At the counter | Blink Terminal | Reusable Paycode |
|---|---|---|
| Who enters the amount? | Staff enter the total before showing the request. | The customer enters the amount when paying. |
| What do customers scan? | A Lightning QR generated for the payment. | The same printed or displayed QR each time. |
| When is it useful? | Orders with a total set by the cashier. | Tips, donations and customer-entered payments. |
| How do you check receipt? | Check the Terminal status and your Activity. | Verify the incoming payment in your Activity. |
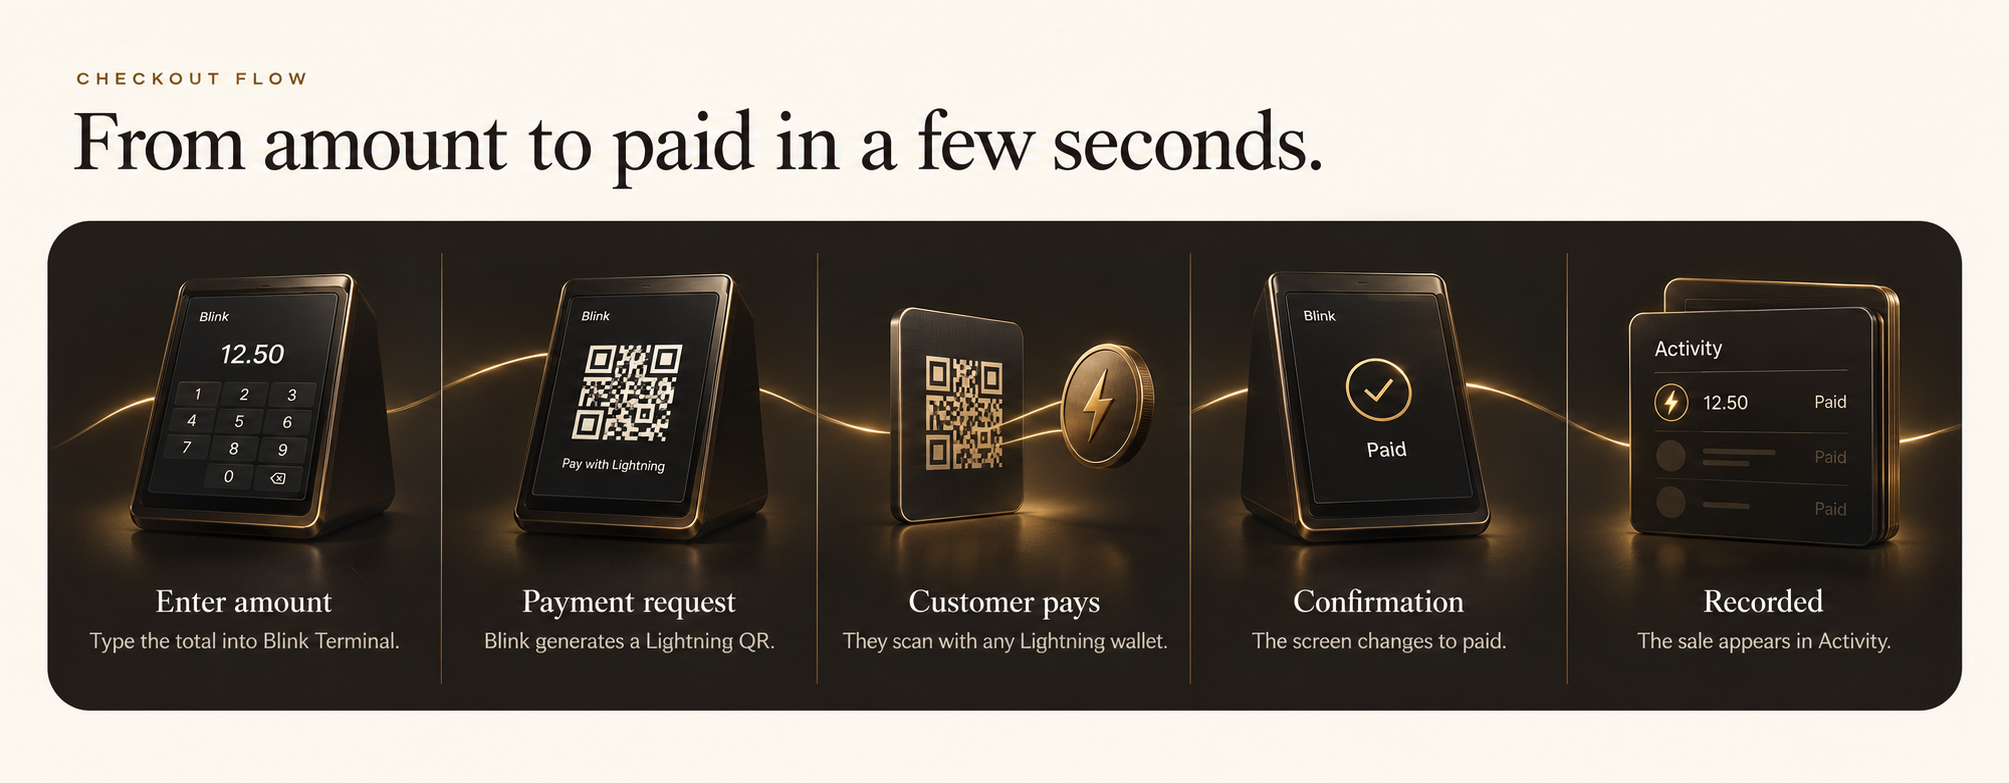
Checkout flow
Type the total into Blink Terminal.
Blink generates a Lightning QR.
They scan with any Lightning wallet.
The screen changes to paid.
The sale appears in Activity.
Use the status shown by your Terminal or the incoming transaction in your Blink account to confirm receipt. Check that the amount matches the order. A screenshot on the customer's device should not replace your own payment confirmation.
If the customer has already attempted a payment, check its status before issuing another request. This helps you avoid charging the same order twice.
Use Activity to review incoming payments and their status. Match payments with your order records as part of your normal till routine, especially when several customers pay close together.
For reusable QR payments, verify the amount the customer entered. Review the receiving balance as part of your setup and keep access to the wallet separate from everyday cashier use.
Merchant questions
No. Blink Terminal runs in a browser on a laptop, desktop or point-of-sale display. A printed Paycode is another way to receive payments at the counter.
A Lightning invoice requests a specific payment and can expire. A reusable Paycode identifies your Blink account and can be used for multiple payments, with the customer entering an amount.
Blink Terminal lets staff create payment requests on your behalf without giving them access to the funds in your account. Keep your wallet login and recovery information private.
Direct Paycode payments require LNURL support. The customer can instead scan the code with their device's camera and follow the link to create a standard Lightning invoice.
Check the request and payment status before asking the customer to try again. Confirm the amount and destination, and check your Activity. If the payment remains unclear, use the help centre before creating another request.
Keep exploring